If you don’t know how to repair TV main board, here is a quick solution. First, Diagnose the issue with the Mainboard, identify the corrupted components, and Replace the faulty components as per requirements. The specific steps to repair the Mainboards depend on the model of your TV.
The guide you must follow varies and depends on the problem with your Mainboard. If you try to turn on your TV and it fails to power on, you see no signs of the Mainboard’s life; it indicates your Mainboard is malfunctioning.
Maybe It’s just our assumption that your TV is malfunctioning due to the faulty Mainboard. There might be some other issue with your TV. Therefore first, you should ensure that the Mainboard is malfunctioning.
Don’t worry. I will tell you the Mainboard failure symptoms to determine if Mainboard is corrupted.
Moreover, Before starting the repair process, it’s important to know the possible issues a Mainboard or Motherboard can encounter.
TV Main Board Failure Symptoms

The following are several symptoms to indicate the malfunctioning of the Mainboard.
- No power
- No Display
- Audio problems
- Freezing or crashing
- Connectivity issue
- On-Screen errors
1. No power
If you press the power button, your TV fails to turn on. You will see no signs of power either. This is the first sign of the Mainboard malfunctioning.
2. No Display
When your Tv is powered on but you see no picture, display, or blacklight on the screen. There is some Mainboard issue.
3. Audio problems
Sometimes you see the display on the screen, but your TV produces no sound. Or you will hear distorted audio. If you see no display on the screen plus no sound, it also indicates a faulty Mainboard.
4. Freezing or crashing
When your TV freezes, show no response and restarts unexpectedly. Again, it’s a sign of a faulty Mainboard.
5. Connectivity issue
There might be some Mainboard issues if you continuously face connection problems with the WiFi, USB, and HDMI ports.
6. On-Screen errors
Error messages or unexpected artifacts are displayed on the TV screen.
When you experience any of the above symptoms, follow the steps I will discuss below to fix the issue.
What Are The Issues That A TV Motherboard Can Come Across?
A Mainboard can encounter various issues. Following are the issues that a Motherboard comes across.
- Power issues: The TV’s Mainboard can encounter problems like faulty capacitors or power supply issues.
- Overheating: If you place the TV in a hot place or continuously use it for a long time, it causes overheating. Insufficient cooling or faulty fans ( TV’s internal fans) leads the motherboard to overheat.
- Mainboard Components Failure: There are many components of the Mainboard, such as CPU, RAM, ROM, or Chipset. If any of these fails, it causes Motherboard issues.
- Physical Damage: Handling damage, electrical surges, or liquid spills may affect the motherboard’s performance.
- Compatibility issues: Some outdated BIOS Firmware or incompatible hardware results in glitches and improper functioning.
- Compatibility issues: Incompatible hardware or outdated BIOS firmware can result in conflicts or improper functioning
Note: In some cases, you cannot diagnose these issues. For this purpose, these issues often require professionals to diagnose and fix the problem. You should replace the corrupted components or the entire motherboard.
Step-by-Step Guide: How to Repair TV Main Board?
If you’re experiencing issues with your TV’s main board, don’t worry! This step-by-step guide will help you diagnose and repair the problem. Just follow these easy instructions to get your TV up and running again.
Step 1: Download the TV’s Schematics
Start by obtaining and downloading the circuit board schematics for your TV model. These schematics provide a detailed diagram of the main board and its components, which will be helpful during the repair process.
Check the TV manufacturer’s website or search online for the schematics specific to your TV model.
Step 2: Unplug the TV and Prepare the Work Area
Ensure the TV is unplugged from the power source to avoid electrical hazards.
Place a towel or soft cloth on a flat surface to protect the TV screen from scratches. Carefully lay the TV face-down on the prepared surface.
Step 3: Prevent Static Charge
Touch a metal object to ground yourself to prevent static charges from damaging sensitive electronic components. It is also recommended to use ESD-safe tools and equipment, as they offer better protection against static discharge.
Step 4: Remove the TV’s Back Panel and Connect the Multimeter

Using both flathead and Philips screwdrivers, carefully remove the screws securing the back panel of the TV. Once the back panel is off, you can proceed with the repair process.
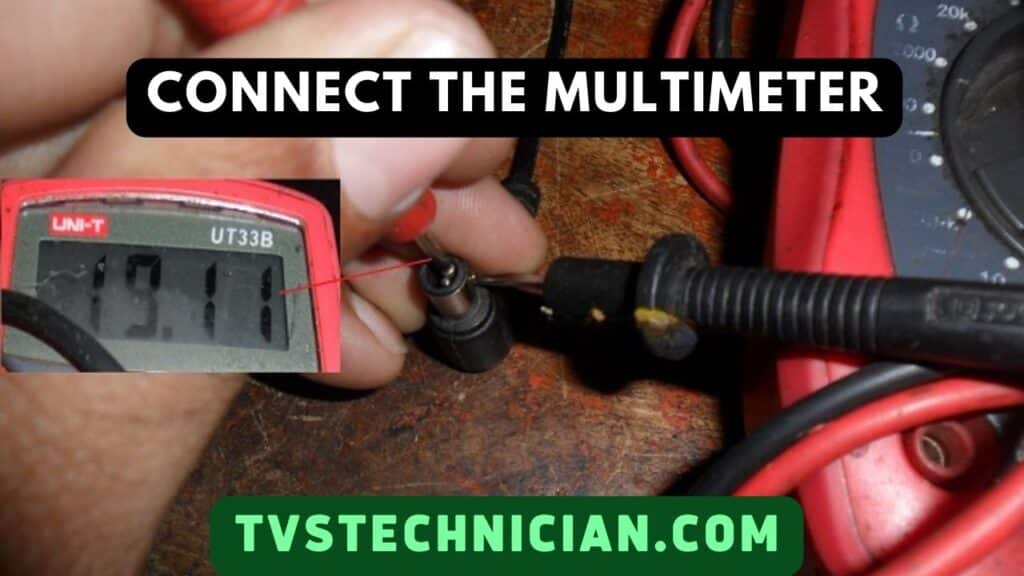
Additionally, connect the multimeter to the appropriate ports. These ports are typically color-coded, making identifying where to connect the multimeter leads easier.
Step 5: Inspect the Main Board for Physical Damage
Thoroughly examine the main board for any signs of physical damage. Look for components that appear swollen, broken, warped, or burned. It’s essential to double-check and ensure there is no physical damage present on the main board.
Step 6: Test for Resistance

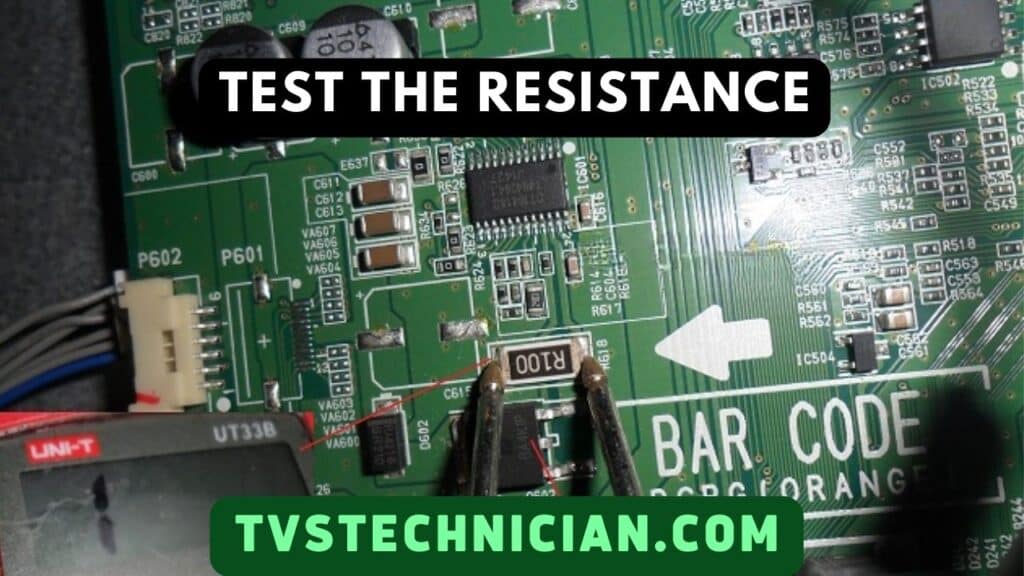
Using the multimeter, test the resistance of the components on the main board. Hold the multimeter leads on both sides of the component you suspect to be faulty.
Compare the resistance reading you obtain from the multimeter with the values indicated on the schematics.
Step 7: Identify and Replace the Faulty Component
Repeat the previous steps to identify the specific component causing the issue. Once you have located the faulty component, it’s time to replace it.
Refer to the schematics to find the correct replacement part and carefully install it on the main board. Be sure to follow proper soldering techniques if necessary.
Step 8: Test and Verify the Repair
After replacing the faulty component, reassemble the TV by securely attaching the back panel. Plug the TV back into the power source.
Power on the TV and test it to see if the issue has been resolved. Check for proper functioning of all features, such as audio, video, and connectivity.
If the problem persists, it is advisable to seek assistance from a professional TV repair service.
Remember, if you are uncertain or uncomfortable with any part of the repair process, it is always best to seek professional help.
Some Helpful Troubleshooting Guide For A TV Mainboard
When your TV has some issue, you don’t know how to repair it. Most users first decide to return their TV to the manufacturer or contact any Professional. But then it seems costly, which is a reality.
Taking your TV to a manufacturer or professional can sometimes cost a lot. In such a case, repairing your TV at home is better. Some issues with your TV’s motherboard are easy to solve by yourself.
Vertical or horizontal lines, no sound output, no video output, and faint or no color display are simple and easy-to-fix issues. The tools you need to start and end up repairing include Replacement parts, Multimeter and Screwdriver.
You can fix various Mainboard issues by following a simple guide. You must contact a professional if there is some technical issue that can be hard to fix.
Before Taking your TV to any professional, check the warranty. If the warranty is ongoing, you can send your Tv to the manufacturers and repair it without cost.
Frequently Asked Questions (FAQs)
The symptoms of a bad main board include No display, No sound, green power light turned on and shut off, freezing, and audio problem.
TV Motherboard or Mainboard repair costs $275 on Average. If the parts and labor are included, it costs around $ 200$ to $350. The replacements parts cost around $35-$200, and labor costs around $60-$125
Overheating, Liquid damage, smoke, debris, and dust are common causes of Motherboard Failure. However, any voltage or electric fluctuations are reasons for the Mainboard failure.
Conclusion:
Repairing TV Main Board requires some easy steps to follow. Moreover, three important tools are needed, including Multimeter, Screwdriver, and Replacement parts. Some issues are easy to fix at home by following the guide.
But if there is some technical issue, it is suggested to take your Tv to the manufacturer or any other professional. Before taking your Device to any professional, Check the warranty of your Tv.
If the warranty is still ongoing, contact the manufacturer and save money. Now follow the guide above and fix and repair the MainBoard.
Related Articles
- How To Reset TCL TV With Black Screen? 8 Simple Ways
- 6 Ways- How To Connect TCL Roku TV To Wifi Without Remote?
- [Fixed] TCL TV Screen Goes Black But Sound Still Works
- TCL TV Reset Button | How To Use It For Factory Reset?

Hi! Someone in my Myspace group shared this website with us so I came to check it out. I’m definitely loving the information. I’m book-marking and will be tweeting this to my followers! Fantastic blog and terrific style and design.